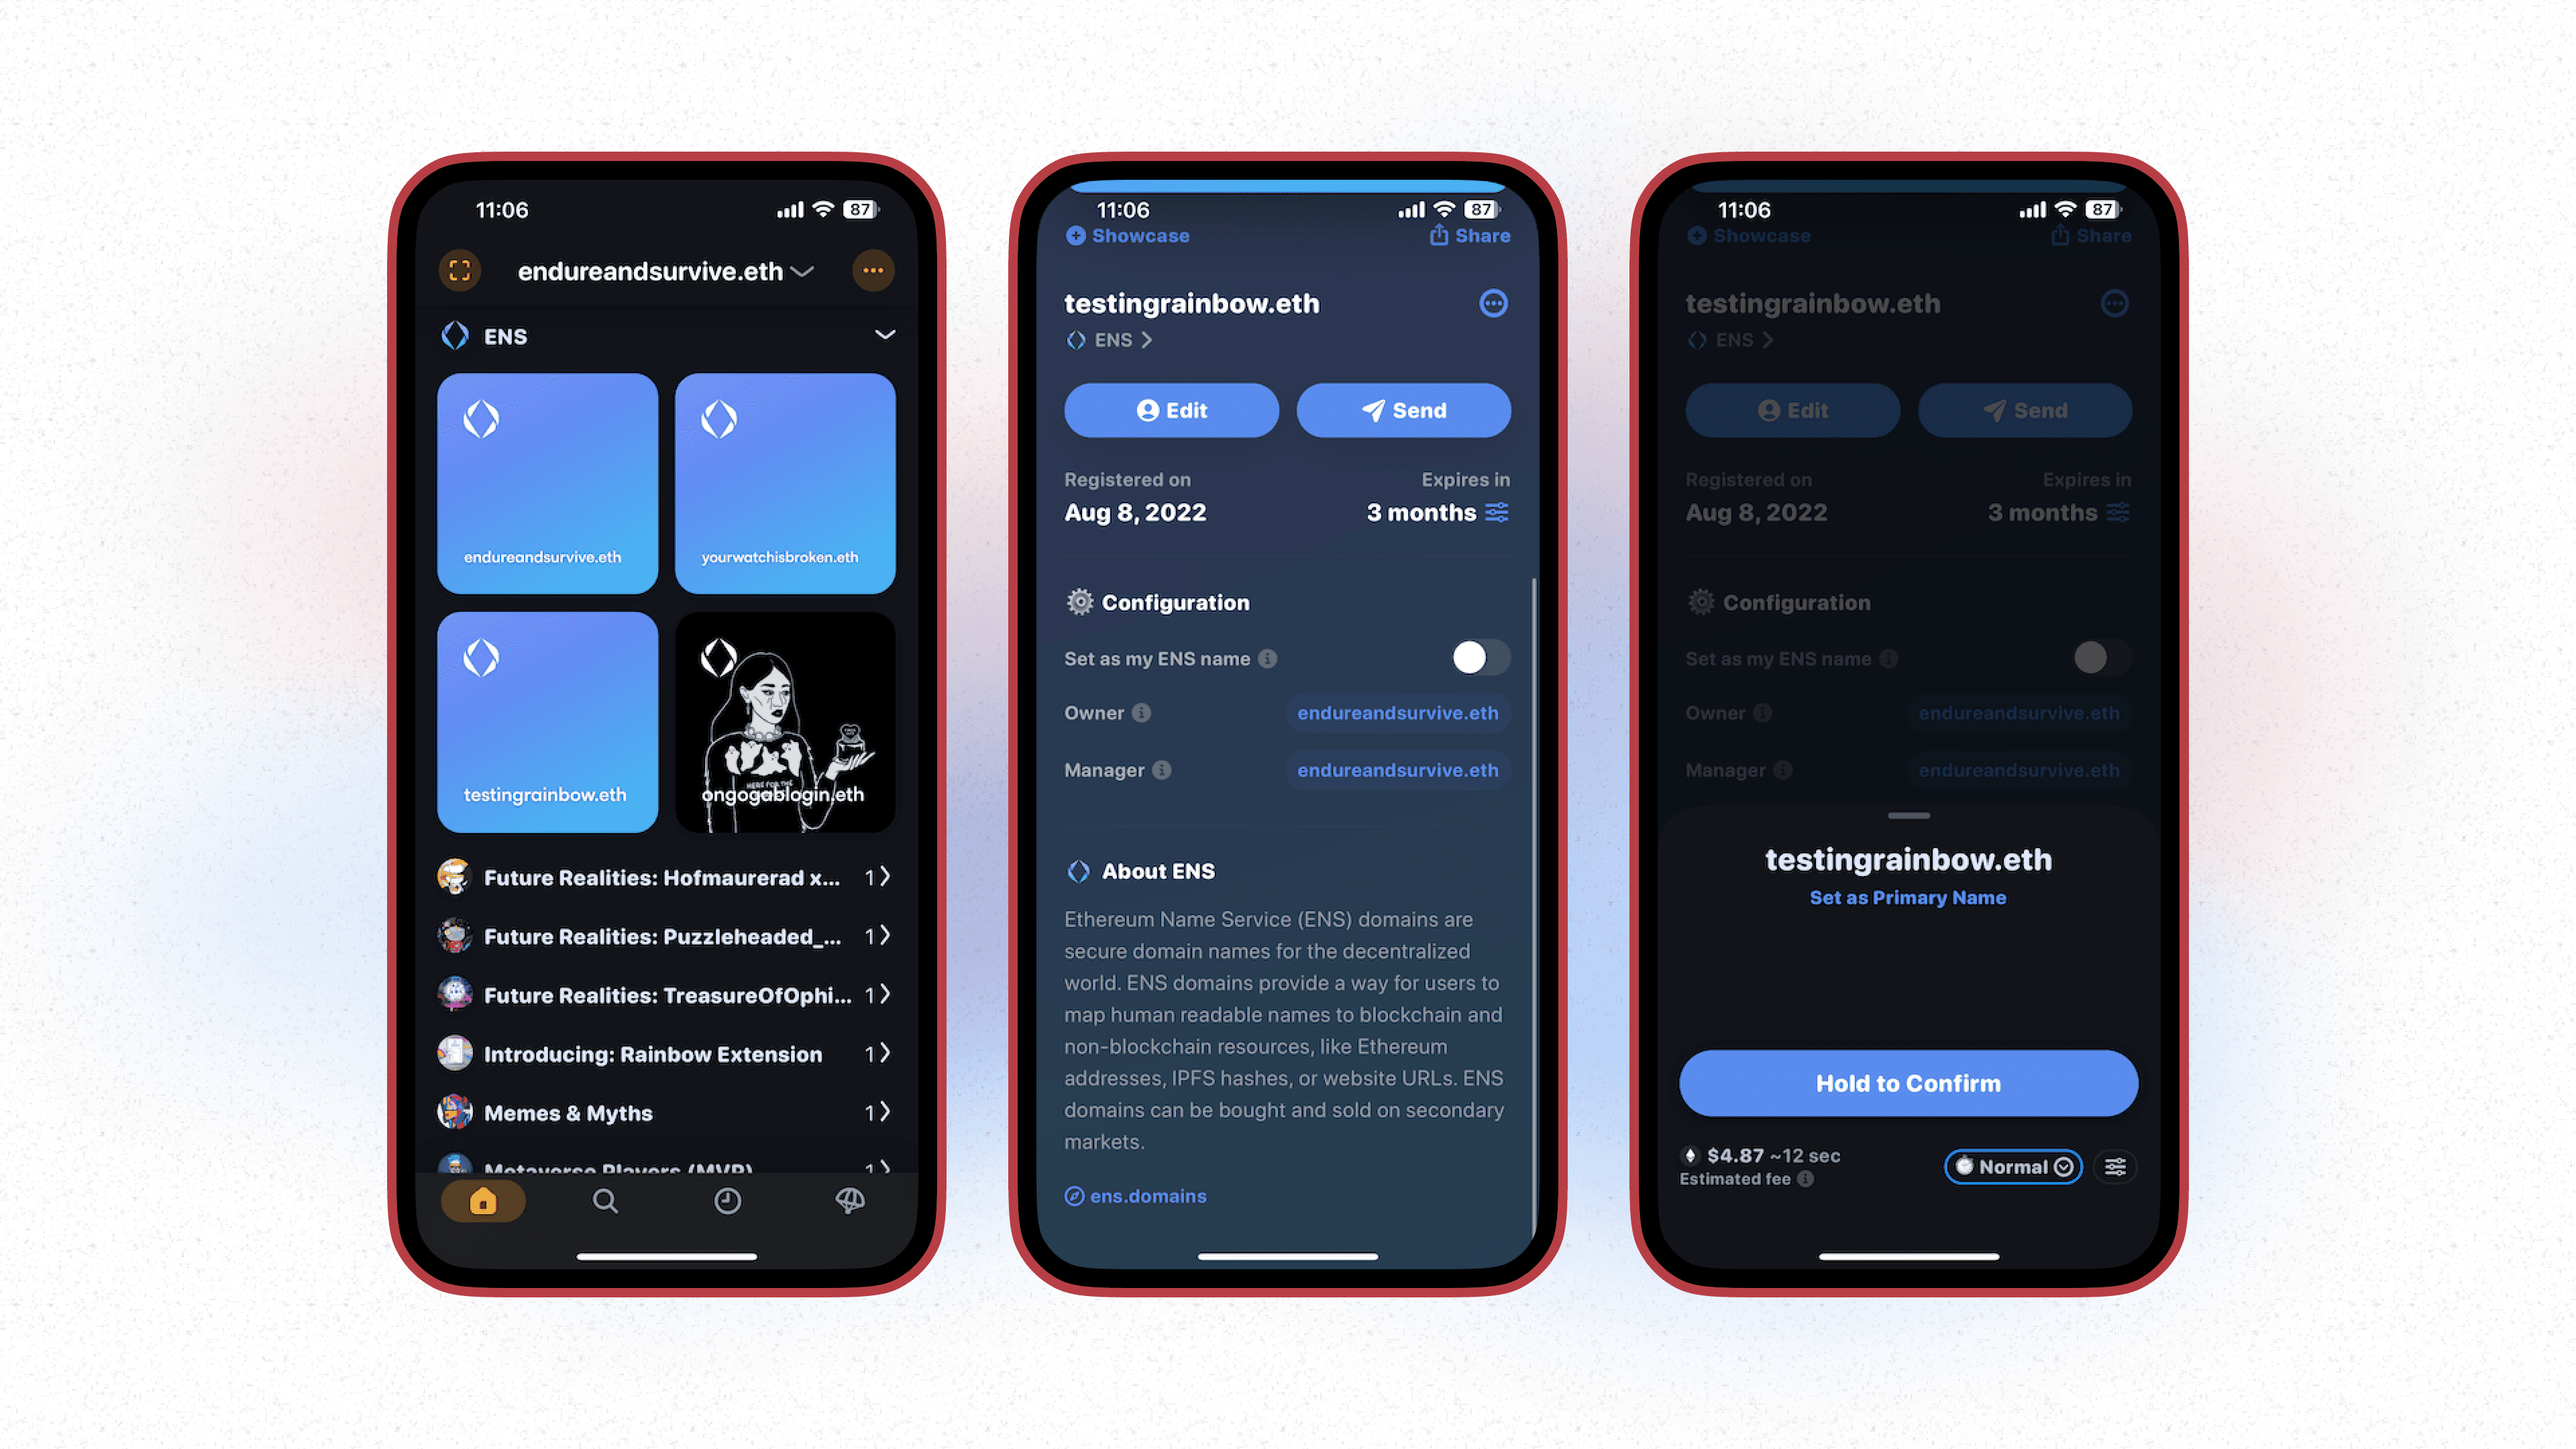
🌐

Setting your ENS Name

Setting your name is super easy! In this guide, we’ll show you how to directly set that name within Rainbow or on the ENS website directly.

Instructions to Set on Rainbow:

Step 2: After clicking the ENS name, you’ll scroll down to the ⚙️ Configuration section. Here, you’ll want to toggle the Set as my ENS name option

Step 3: Here, you can review the estimated fees. Once reviewed, you’ll click on Confirm Set Primary Name. After the transaction finishes, you’re username will be set!

Step 2
Step 2
Step 3
Step 3

Instructions to Set on ENS Directly:

Step 1: Connect your wallet to the ENS website and go to your profile/account on their website

Step 2: Tap on the section that refers to your “Primary ENS name (reverse record)”

Step 3: Use the selection tool that appears to select the domain name you’d like to use as your public username

Step 1
Step 1
Step 2
Step 2
Step 3
Step 3

Step 4: Tap the “Save” button

Step 5: Next, tap “Open in Rainbow” if you’re doing this process on a mobile device

Step 6: A transaction request will appear in Rainbow. Review the details, then tap “Confirm” to authenticate the transaction with your device’s biometric or passcode. After the transaction finishes, you’re username will be set!

Step 4
Step 4
Step 5
Step 5

Additional Readings: