What is ENS?
ENS (Ethereum Naming Service) is a decentralized web3 identity and username platform. You may have seen many people displaying a .eth name as their Twitter username, these .eth names are ENS domains.
On a basic level, owning an ENS domain allows you to have a simple and human-friendly username that will redirect to your long and complicated wallet address. So, instead of having to remember or constantly copy a string like this: 0x7a3d05c70581bD345fe117c06e45f9669205384f
You can instead just write or send people this: rainbowwallet.eth
This is somewhat similar to the DNS system of the traditional internet. When you type in “google.com”, under the surface it actually redirects you to a long and complicated IP address.
What can an ENS domain do?
ENS domains can do a lot more than just be a handy shortcut, they can also act as your “web3” username and identity profile.
If you own an ENS domain inside your wallet and set it up correctly, your domain name will actually appear on most of the sites that you connect your wallet to. When you login to Uniswap using Rainbow, it actually recognizes your username and displays it.
ENS shows the powerful potential of web3. Instead of having to create individual accounts and profiles with every website (thereby relinquishing your data and control over to a centralized entity), you instead own your profile and identity and it goes around the web with you.
In this guide 👇, we’ll teach you how to purchase your first ENS domain directly using Rainbow!
Instructions to Register on Rainbow:
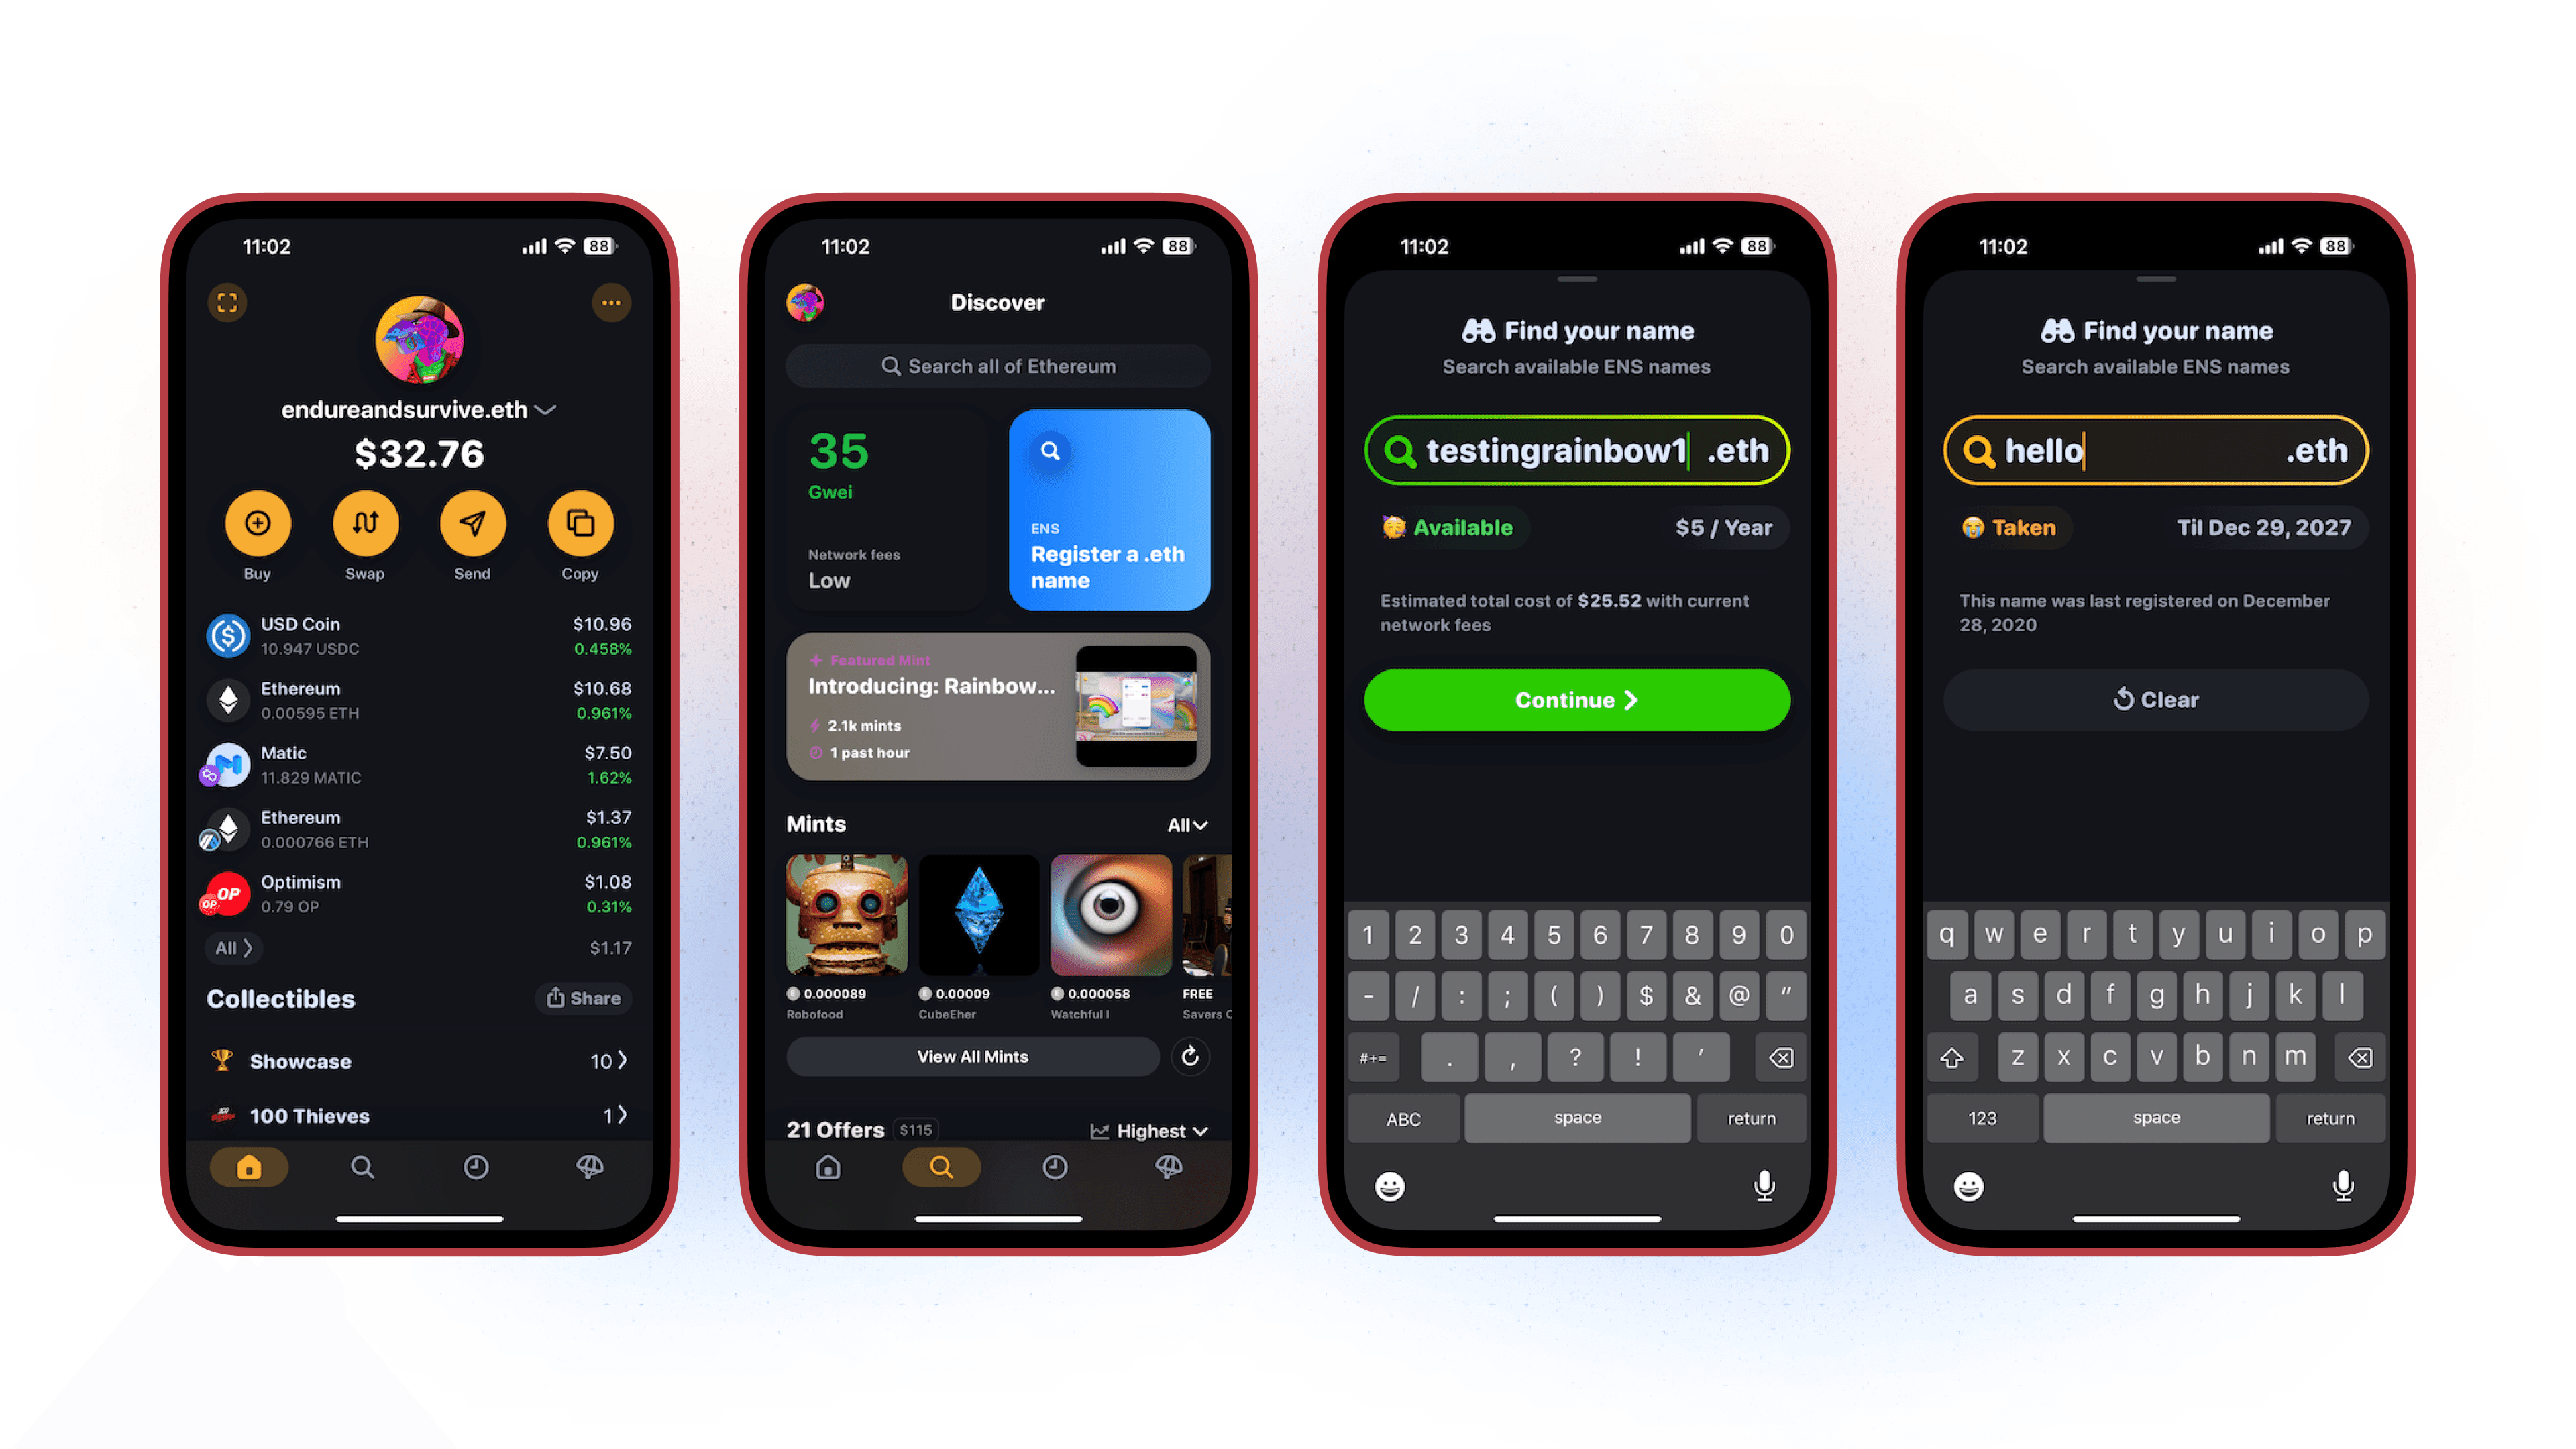
On your main wallet screen, tap the search icon on the bottom navigation bar to head to the Discover page.
Next, click the Register a .eth name button.
You can now search for an ENS name! Once you’ve found one that’s available, you can click the continue button:
Note that if you’re searching for one that’s already taken, you’ll see an alert letting you know it’s 😭 Taken
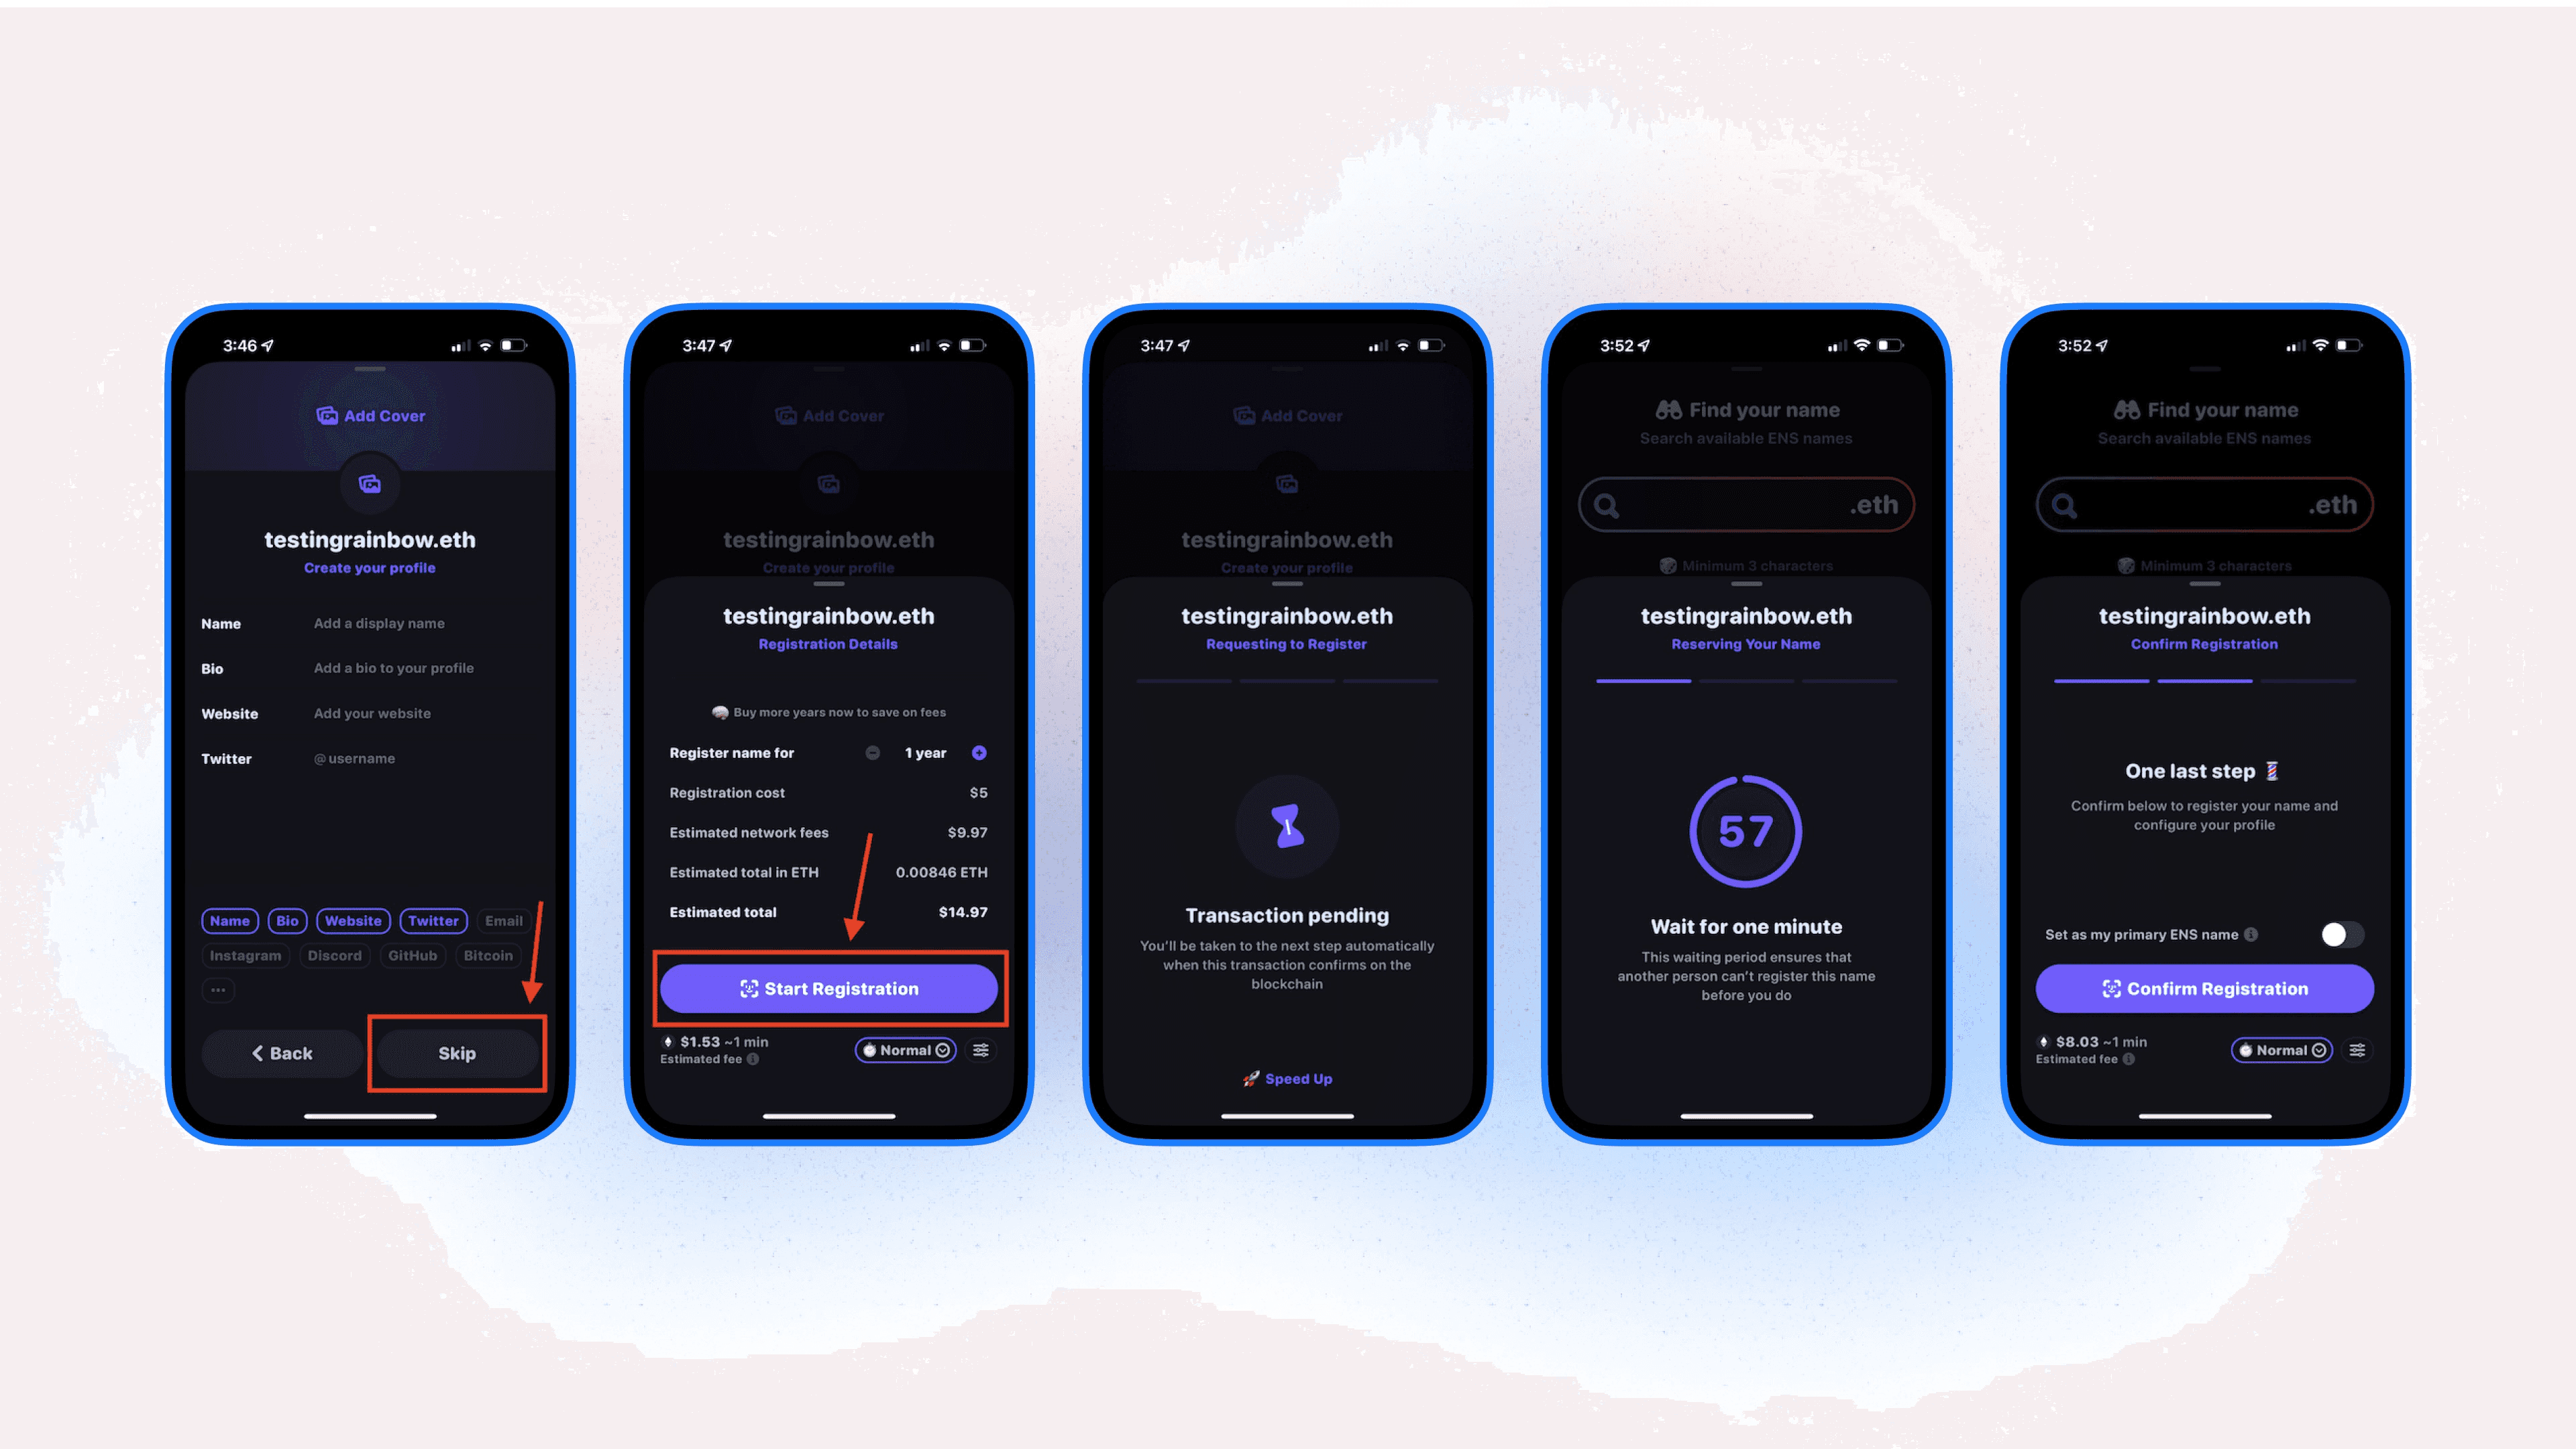
You’ll then be brought to an edit profile screen. You can either choose to edit your profile details here, or, skip to start the purchase process.
📌 Since this information is hardcoded on the blockchain, it means that every edit will produce a gas transaction fee. It’d be wise to include everything in one to save on the gas fees! However, you can edit your profile/make changes at anytime.
Once you proceed forward, you’ll be met with the registration details screen. There’s a few things here for us to review/explore. One, you’re able to set how long you want to register your name for with a minimum of 1 year. You can also review the estimated costs including:
Registration Costs
Estimated Network Fees
Estimated Total in ETH
Estimated Total in USD
When ready, you can then click Start Registration.
Your purchase/transaction will begin and will be pending in the blockchain. This can take some time to move forward to the next step. If you’re interested in speeding up your transaction, you can click 🚀 Speed Up.
Once the request is complete, you’ll then be brought to a Reserving Your Name screen.
📌 The purpose of this minute wait period is to ensure that another person can’t register your name before you do.
After the reservation is complete, you’re then in the home stretch of completing your registration! It’s time to confirm. On the confirm registration screen, before confirming, you have the additional option of setting your ENS name as your primary name. When ready, you can click Confirm Registration.
📌 If you choose to not do this but change your mind later on, you can set your ENS name separately once the registration is complete!
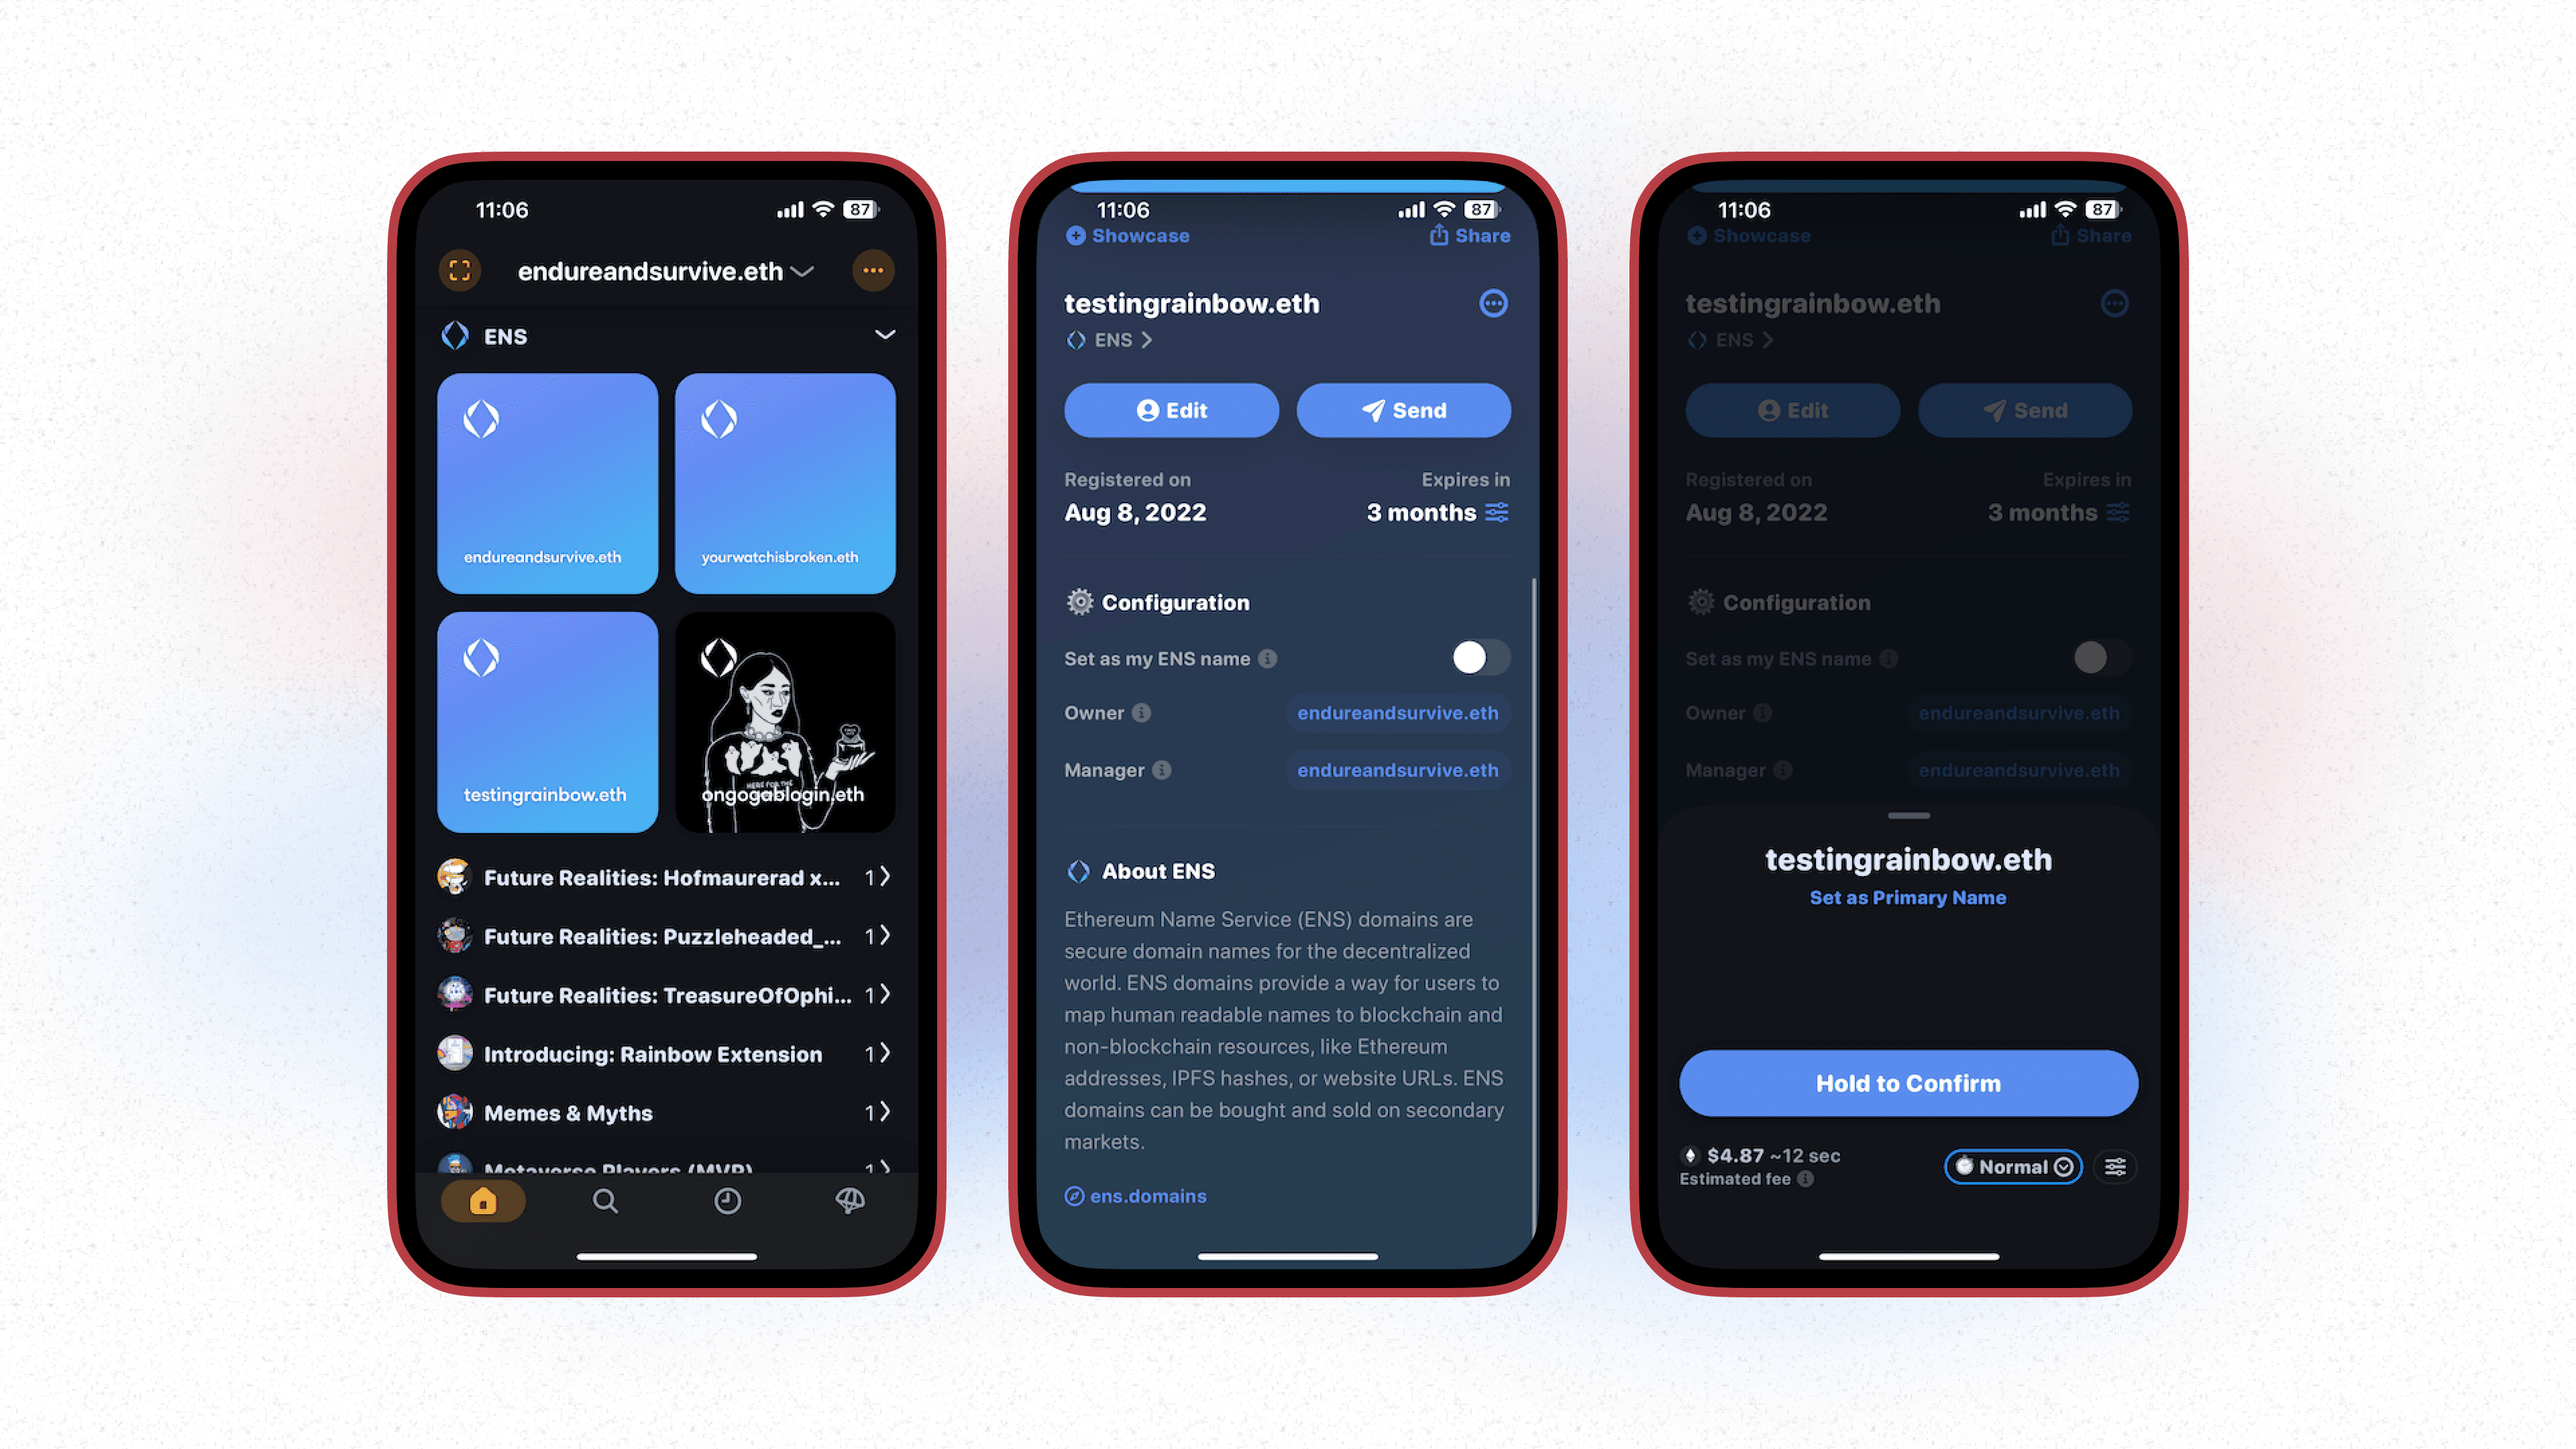
You’ve done it! It may take a few moments for the transaction to complete, but once completed, you can head back to your wallet screen and view your ENS name under collectibles.
(Optional): If you changed your mind and are looking to set your name to your wallet, you can expand that ENS name and click set as my ENS name. This step can be done at anytime!