Rainbow’s backup is a secure and convenient way to backup your wallet on your iOS or Android device. If you for any reason ever need to delete the backup or create a new backup, you can easily do so at any time as long as you still have access to your wallet and device!
How to Delete:
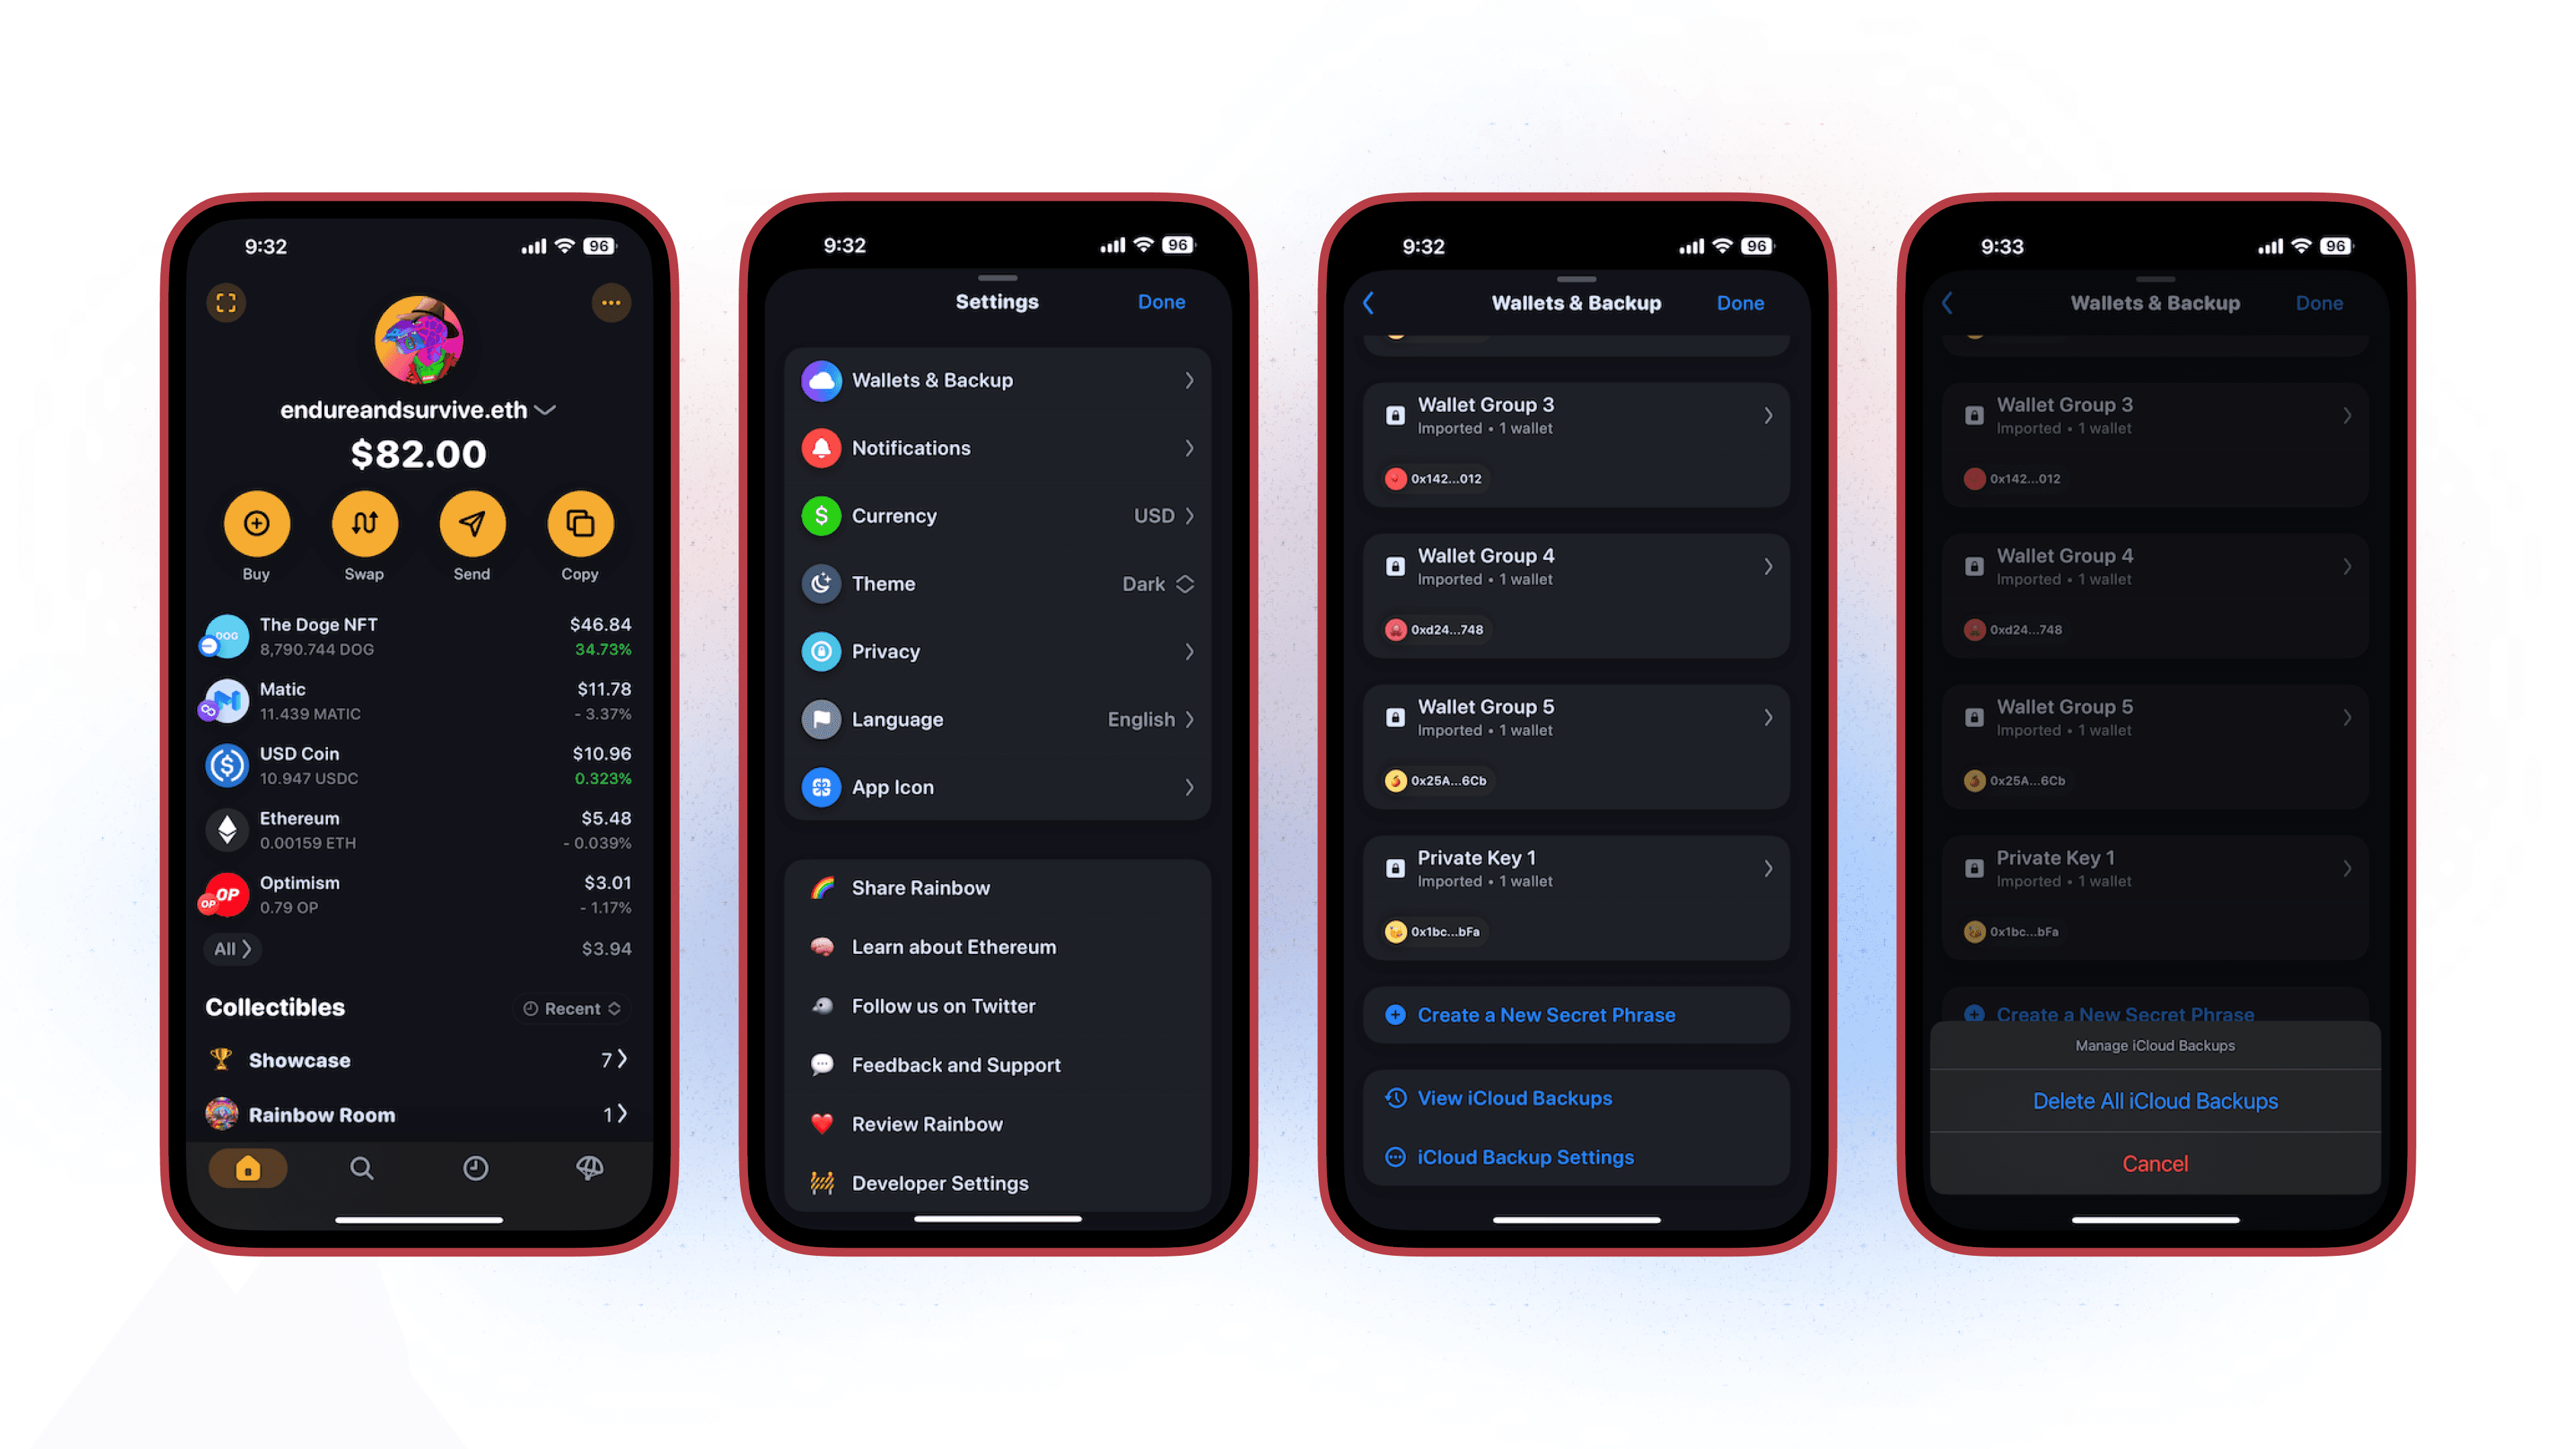
Tap the 3 dots in the upper right hand corner.
You’ll tap Settings → Wallets & Backup
You’ll then scroll down and tap the iCloud/Google Drive Backup Settings
Tap “Delete All iCloud/Google Drive Backups”.
Tap “Confirm and Delete Backups”.