On your main wallet screen, navigate to the wallet switcher using the down arrow next to your public wallet address.
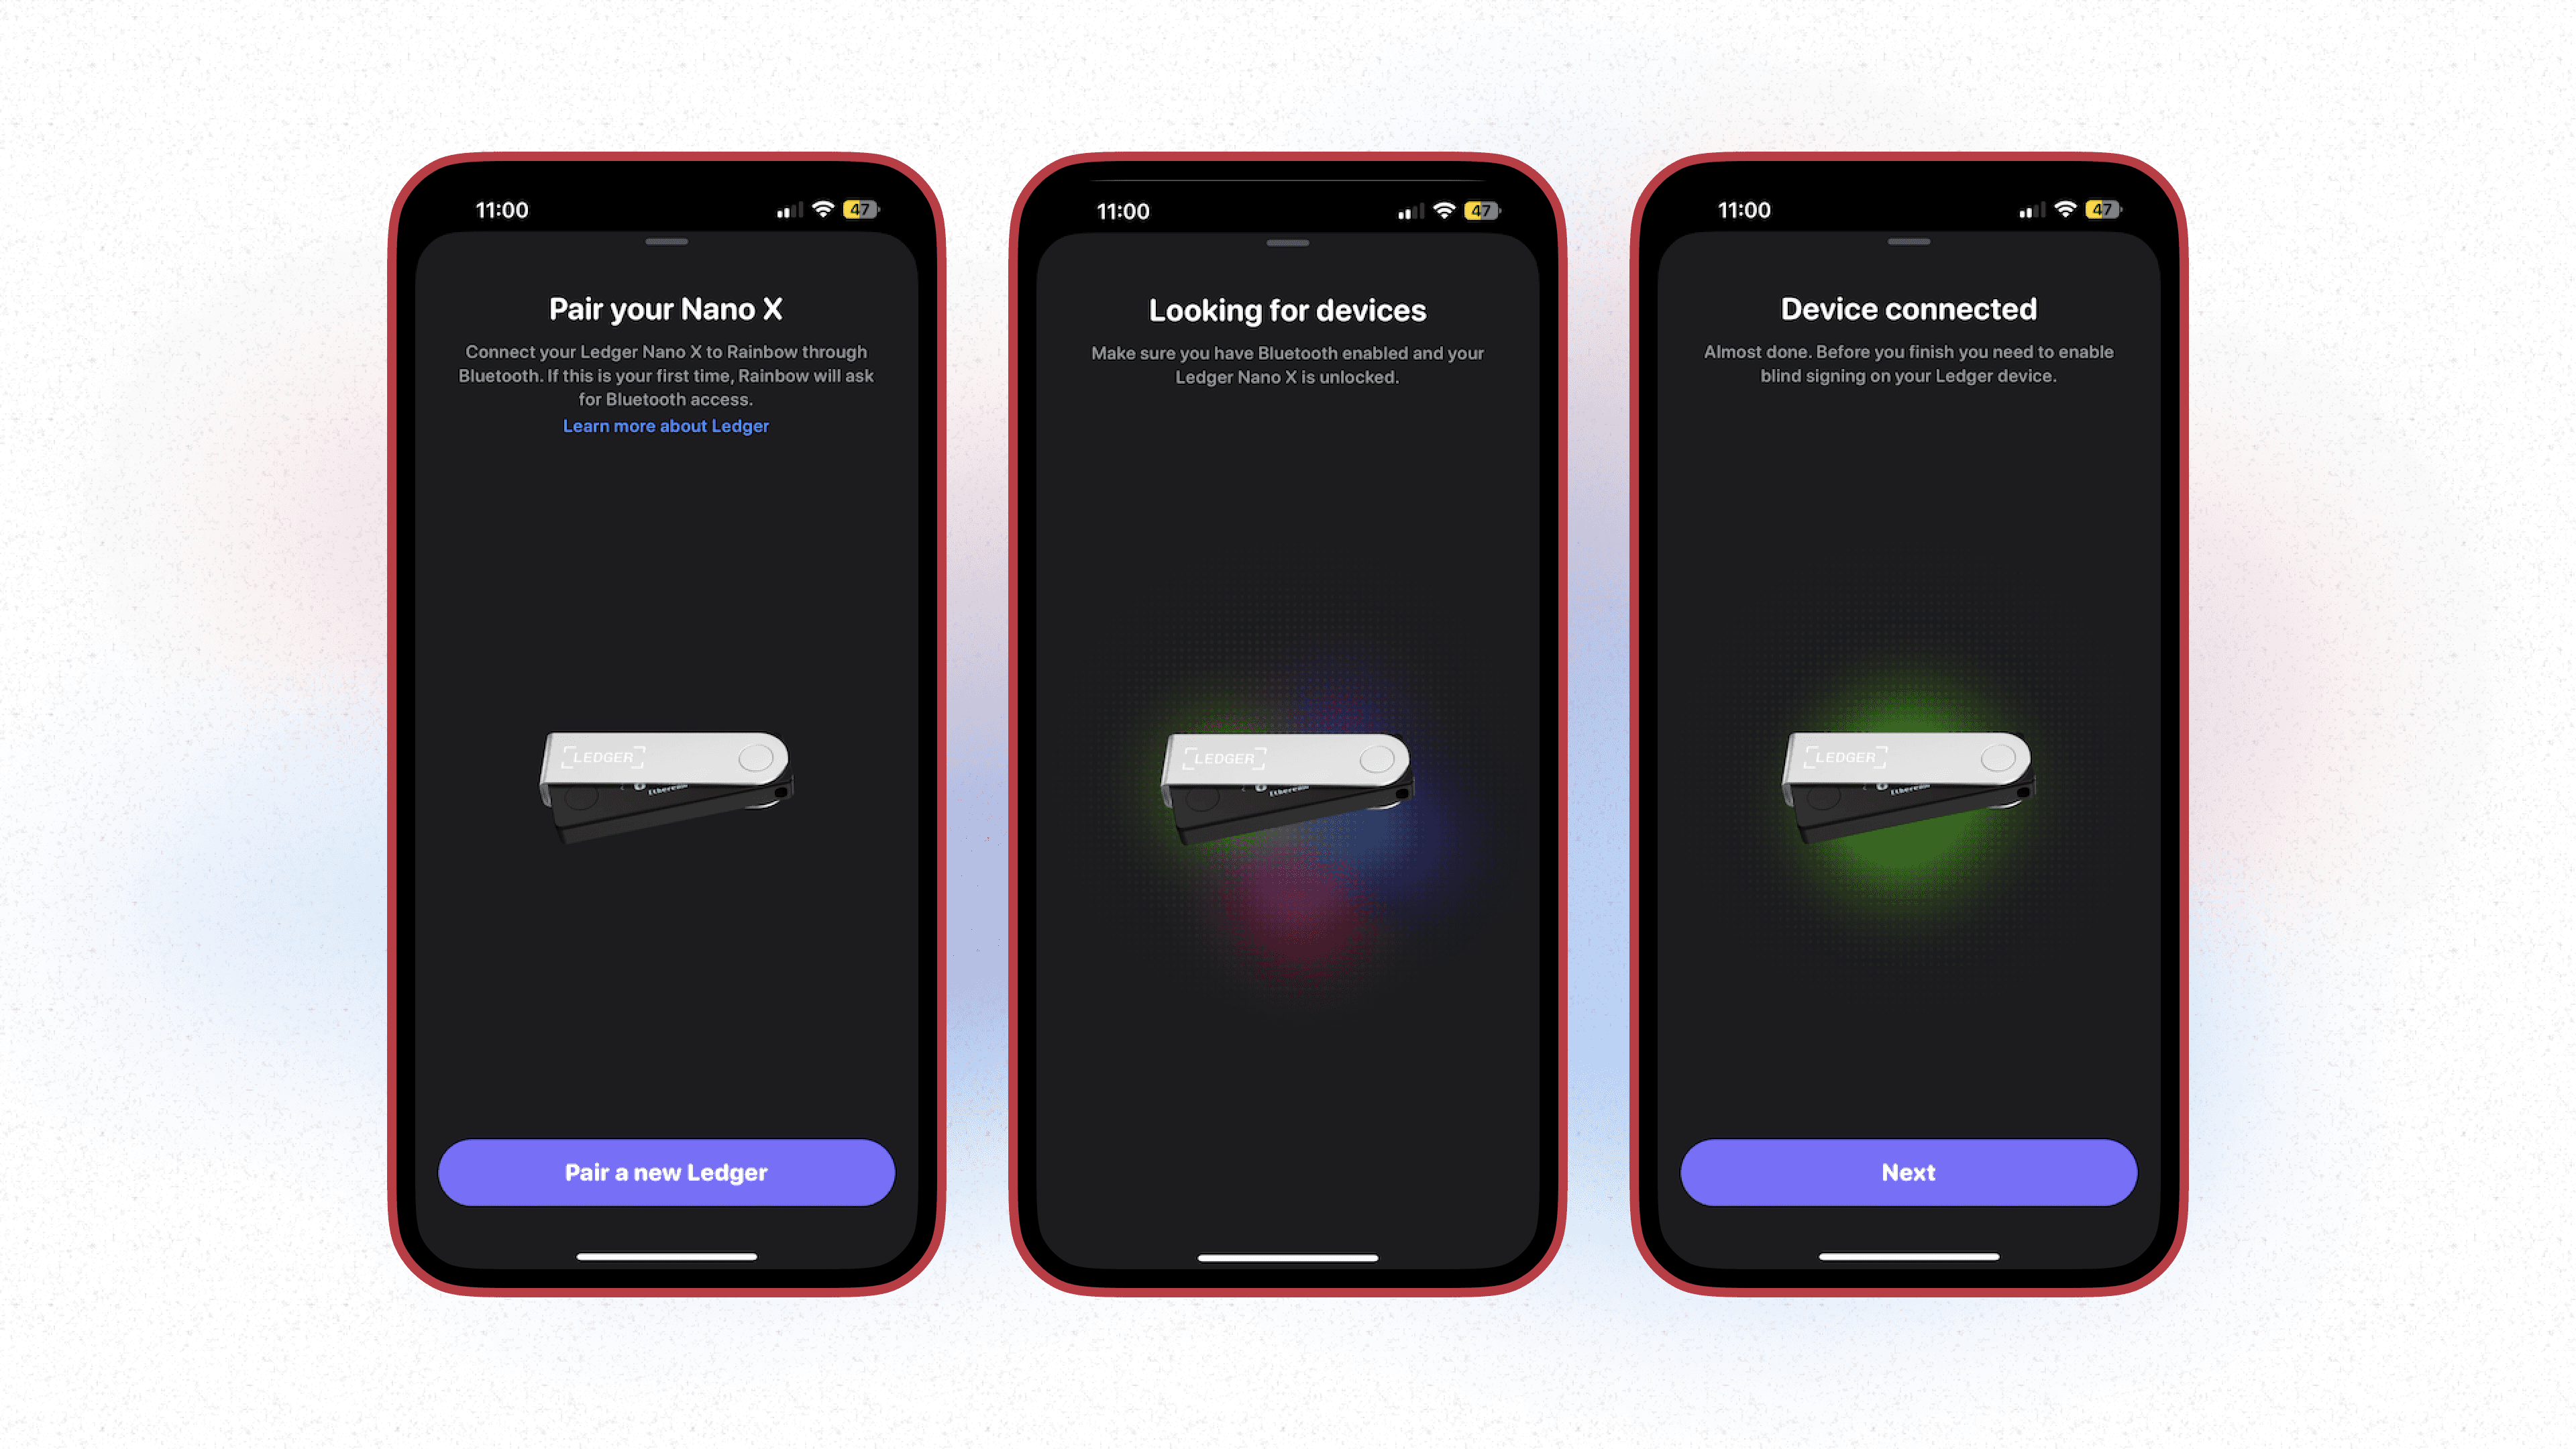
You can either connect your hardware wallet one of two ways: either by selecting Pair a Ledger Nano X at the bottom of the wallet switcher, or selecting Add another wallet → Connect your hardware Wallet. Both paths lead to the same destination!

Once tapped, you’ll then begin the process of connecting your Ledger. Here Rainbow will search for your devices. Once connected, you’ll then be able to move forward on the final steps.
👉 Bluetooth compatibility is only available on Ledger Nano X devices. At this time, Rainbow does not support non-bluetooth Ledger devices.
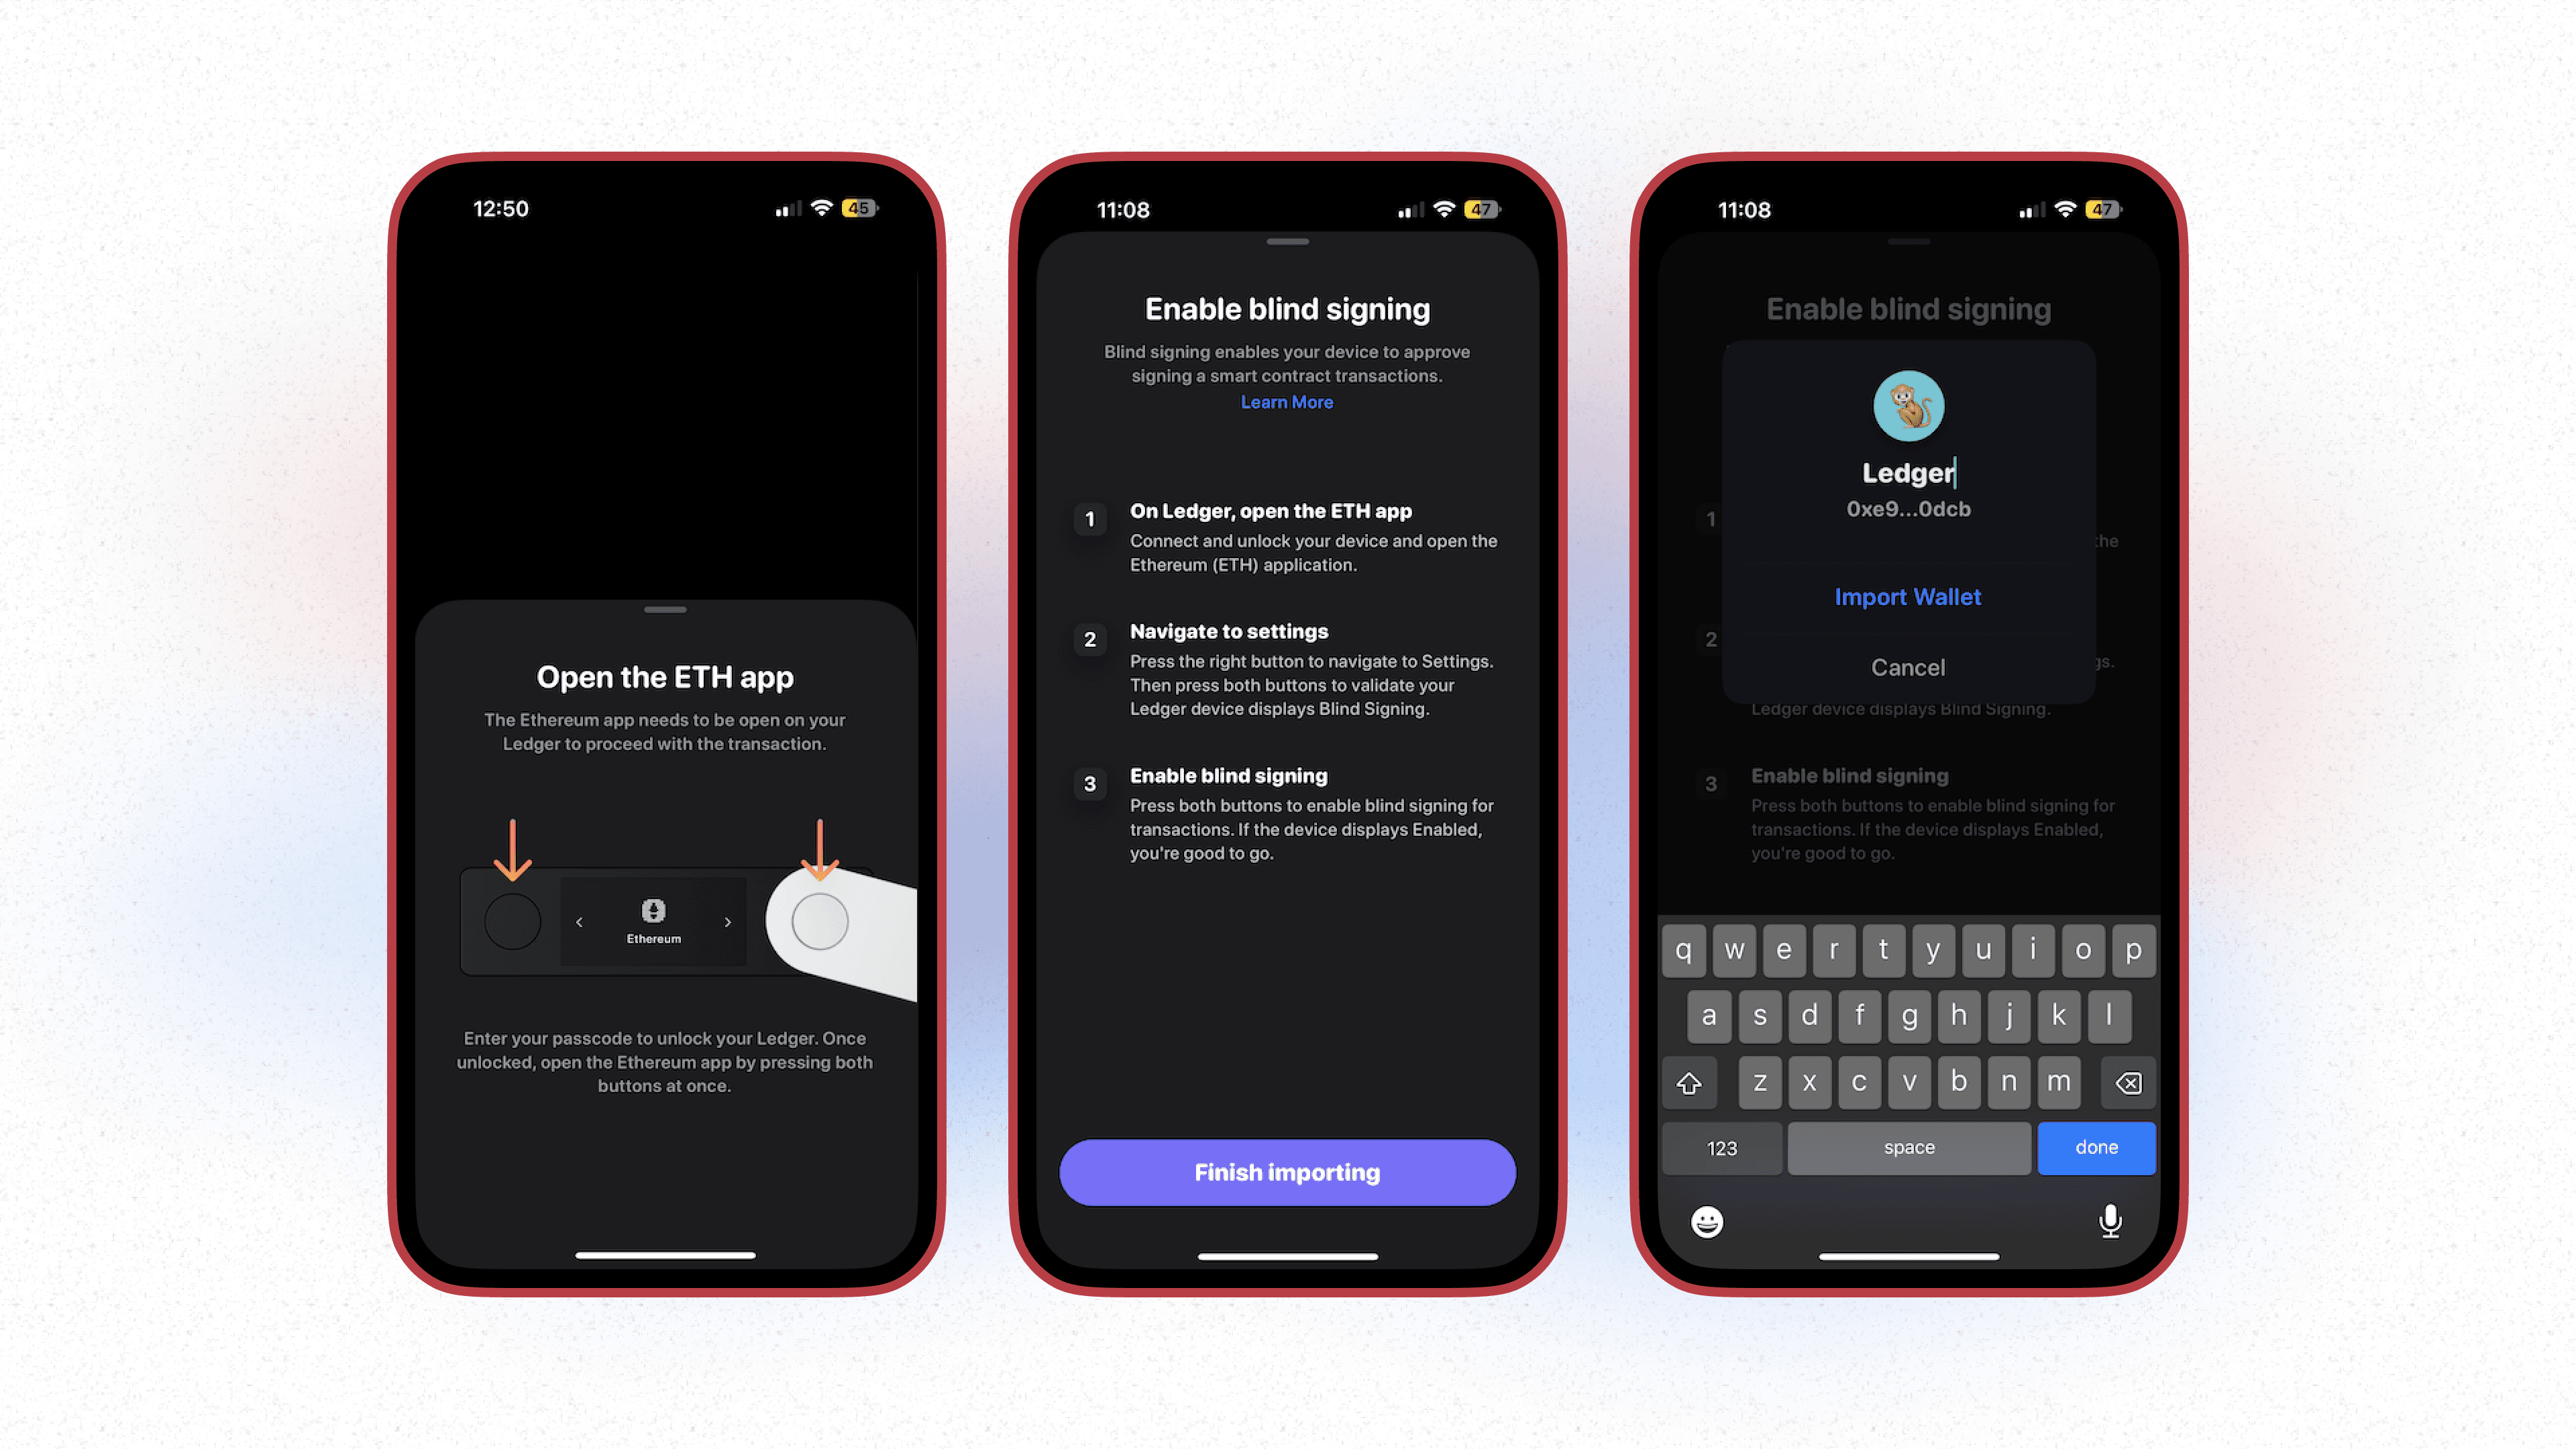
Once connected, you’ll then want to confirm that the Ethereum app is installed on your Ledger device. Once downloaded, you’ll then open the Ethereum app by pressing the both buttons on your Ledger.
You’ll then need to enable blind signing.
Your Ledger is now connected! You can now choose to name the wallet before fully importing.